Most people who buy a standing desk converter get the setup wrong in the first ten minutes and then live with it indefinitely. They shove it too far back on the desk, raise it to a height that feels roughly right, and wonder two weeks later why their neck hurts when they stand. The hardware is not the problem. The setup is. In a small apartment where the desk is already working against you on space, a bad setup is even harder to fix later because you do not have room to experiment.
I have set up standing desk converters in four different apartments and one extended-stay hotel suite. The TechOrbits 32-inch converter is the one I keep coming back to for small-space situations. It is stable at height, the keyboard tray is actually usable, and it does not demand more desk than you have. This walkthrough follows the exact sequence I use to get one dialed in from unboxing to first standing session, including the steps most guides skip entirely.
If your lower back locks up by 2 PM, 30 minutes of standing changes that faster than a new chair will
The TechOrbits 32-inch desk converter has over 7,100 reviews and sits at a price that most standing desks do not come close to. It is the one I recommend for small home offices because it does not require a dedicated room, a full standing desk budget, or dismantling the desk you already own.
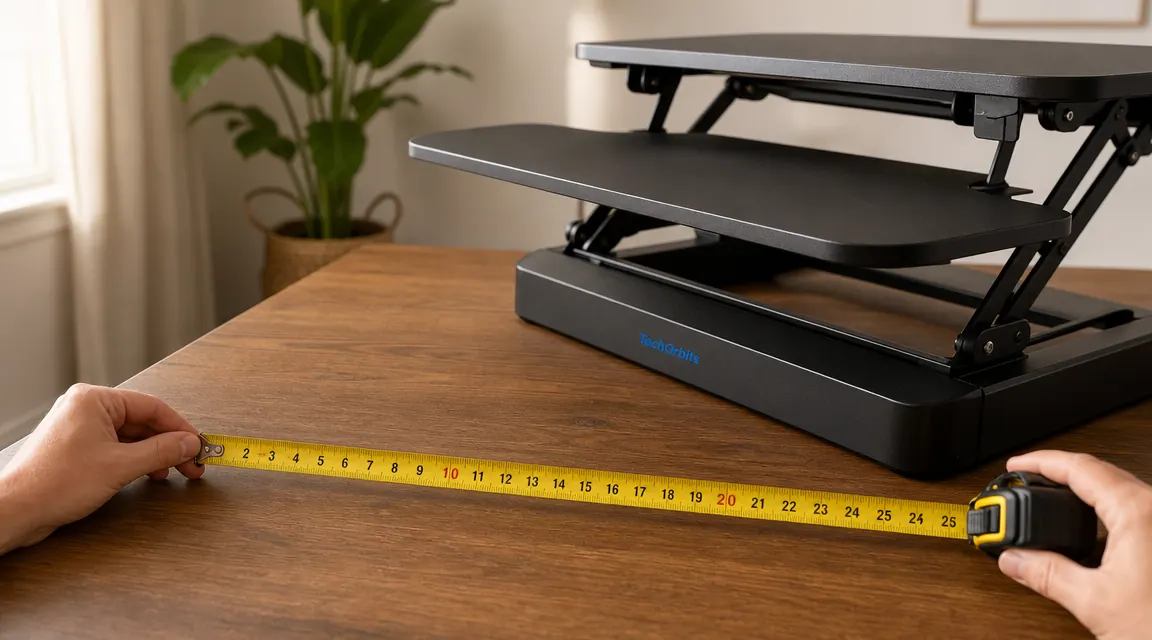
Amazon Check Today's Price on Amazon →Step 1: Measure the Desk Depth Before You Place Anything
The TechOrbits converter has a base footprint roughly 32 inches wide by 22 inches deep. That depth is the number that trips people up. Most apartment desks run 24 inches deep, which technically fits but leaves you with about two inches of clearance at the front edge before the converter base runs into you. If your desk is shallower than 20 inches, a full converter is going to feel cramped and you should consider a riser-only design instead.
Measure from the back wall to the front edge where you sit. Then subtract about three inches for keyboard tray overhang when the converter is raised. Whatever is left is your usable desk depth in sitting mode. If that number is under six inches, you will feel pinched. Most 24-inch desks are workable. Also check vertical clearance. The TechOrbits raises about 15.7 inches at full height. If you have a shelf or cabinet closer than 18 inches above your desk surface, it will clip the platform at max height.
Do this before unboxing. A converter returned because it did not fit is a hassle. One that fits but is positioned wrong costs you months of back strain.
Step 2: Place the Converter and Calibrate Standing Height First
Set the converter on your desk empty, no monitor, no keyboard. Slide it until the keyboard tray sits roughly where your keyboard already lives at sitting height. That usually means the base sits four to six inches back from the front edge of your desk. Mark the position with a piece of tape at the front feet before loading anything.
Now calibrate the standing height before you do anything else. Stand next to your desk in the shoes you normally wear at home. Bend your elbows to 90 degrees. The keyboard tray should sit at or just below that elbow height. For most people between 5'7" and 6'1", that lands somewhere in the middle of the TechOrbits adjustment range, which runs from 4.7 inches to 15.7 inches of lift above the desk surface. Write that height down.
Most people set the converter too high because it feels more active. What that actually does is roll your shoulders forward and angle your wrists downward all day, which creates trapezius tension and wrist fatigue over time. The 90-degree elbow rule is not a suggestion. It is the position.
Calibrate standing height before the monitor goes on. That one sequence change saves most people two weeks of neck pain they would have blamed on the converter itself.

Step 3: Set Monitor Height and Distance
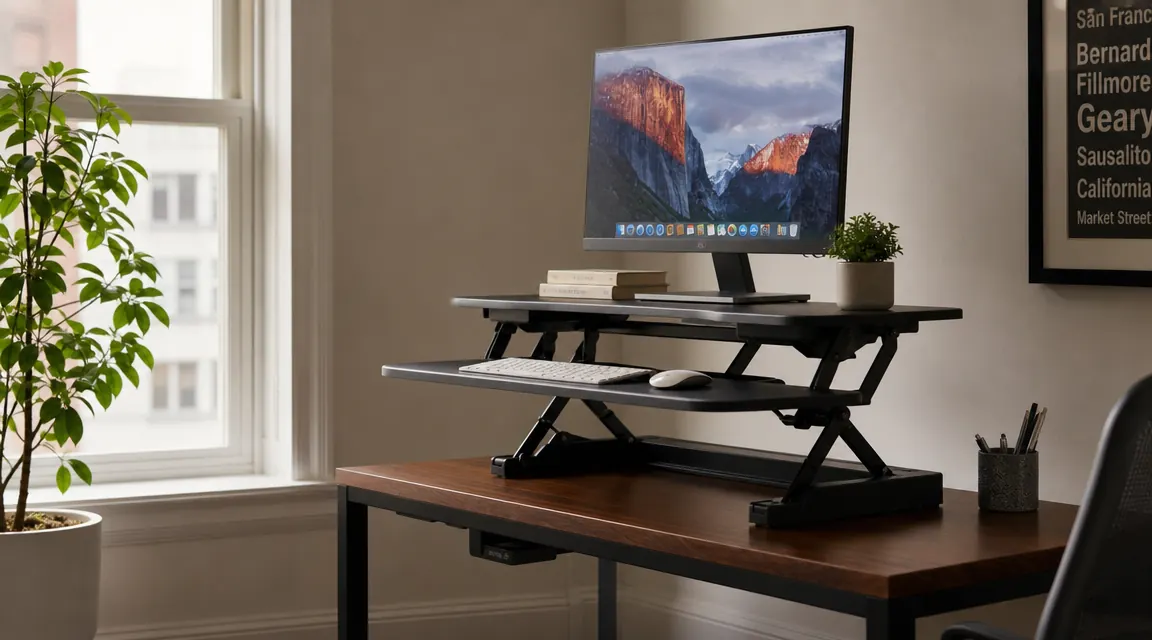
Once the keyboard tray height is set, place the monitor on the top platform and check eye level. The top of the screen should sit at or just below your natural eye level when you are standing with your head straight. If you tilt your chin up to see the top third of the screen, the monitor is too high. If your eyes fall naturally to the middle third without any neck movement, you are in the right zone.
The TechOrbits platform sits roughly 8 to 10 inches above the keyboard tray, which gives you a useful head start on monitor height. Most people do not need an additional riser on top of the converter when using it in a standing position, though if you are taller than 6'1" you may still need one or two inches of lift from a thin riser or a book while you figure out the ideal position. Do not bolt that in permanently until you have stood for a full day.
On depth: the monitor should be at roughly arm's length away. Rest your hand flat on the keyboard tray and extend your arm forward. Your fingertips should nearly reach the screen. In a small apartment, you may not have the full distance available. Get as close as you can, then bump the system font size or browser zoom up one step so you are not squinting at text that is slightly too far.
Step 4: Route the Cables Before the Monitor Is Loaded
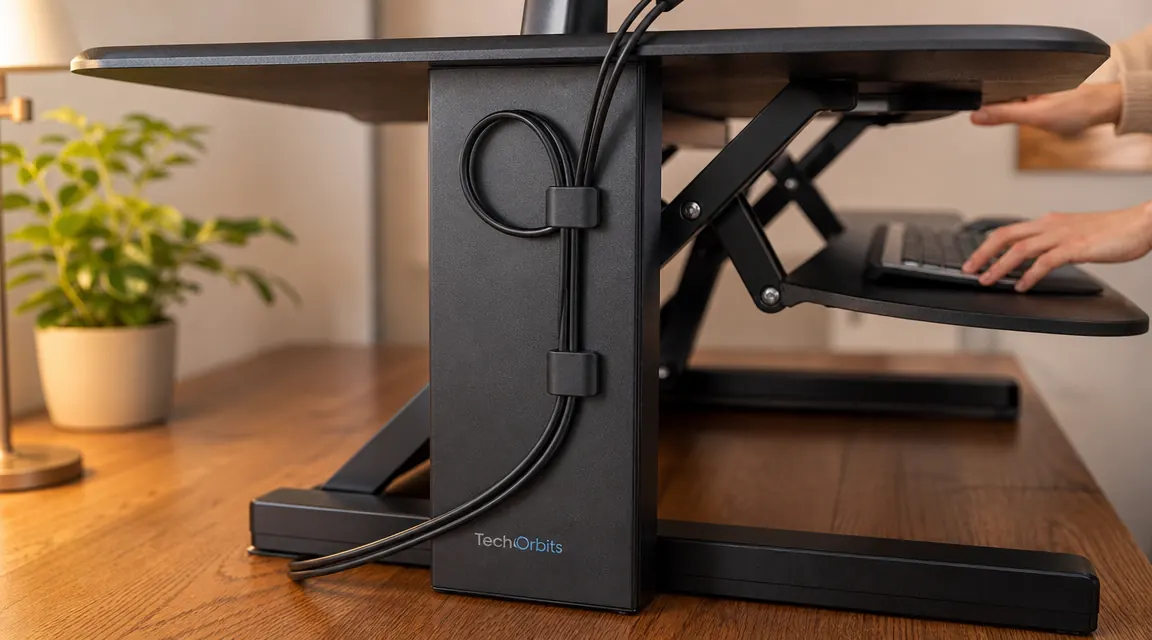
Cable routing on a converter is genuinely annoying if you wait until the monitor is already in place. Do it in order: cables first, monitor second, locked in third.
Thread your display cable and power cable through the rear cable management channel built into the TechOrbits riser columns before loading the monitor. Raise the converter to its maximum height and let the cables hang freely. You want to see how much slack each cable has at full extension. Add at least six inches of extra loop beyond what full height requires. That loop gives the cable somewhere to go when you raise and lower without yanking the monitor or pulling a port.
Use adhesive cable clips along the rear post to hold the bundle loosely against the frame, not tight to the desk. The clips guide the cables but let them slide freely as the converter moves. In a small apartment where the desk sits against a wall, run cables up the back of the converter, over the top of the platform, and back down to the monitor. Invisible from the front, and the cables never fight the mechanism. One velcro tie at the top of the rear post keeps the bundle neat without restricting movement.
Step 5: Test the Full Range of Motion with Everything Loaded
Before you call the setup done, do a full range-of-motion test. Monitor on, keyboard and mouse on the tray, cables routed. Raise the converter to maximum height, lower it to minimum height, do it three times in a row. You are checking whether any cable pulls tight, whether the monitor shifts on the platform, and whether the converter feels stable at max height when you press lightly on the keyboard tray.
The TechOrbits uses a counterbalance spring to handle the weight of the monitor and tray. If you notice slight instability at max height, drop the standing height one or two inches. That shortens the lever arm and meaningfully reduces wobble. Most 24 to 27 inch monitors fall well within the 33-pound weight capacity, so instability is usually a height calibration issue, not a structural one.
Also check the keyboard tray angle during this test. The tray on the TechOrbits tilts slightly. A neutral to mildly negative tilt, meaning the back edge of the tray is a hair lower than the front, keeps wrists flat and reduces strain. A positive tilt forces the wrists into extension all day. Adjust the underside tray lever until the angle feels right before committing to it.
What Else Helps
A standing desk converter does the postural work, but three other things determine whether you actually stick with standing. First, an anti-fatigue mat. Standing on a hard apartment floor in socks for even 15-minute intervals is uncomfortable enough that most people sit back down and stop trying. A mat that is roughly 20 by 32 inches slides under the desk when you are sitting and slides out when you stand. It is a small thing that extends how long you can comfortably stand by a noticeable margin. Most people who skip it abandon the standing habit within three weeks.
Second, a monitor arm. If you are sitting the monitor directly on the top platform, the monitor's stand base is eating into your 32 inches of platform space. A monitor arm clamps to the desk edge and holds the screen at whatever height and angle you need, completely freeing up the converter platform for whatever else you need there. The HUANUO single monitor arm is the one I use and recommend at that price point. If you want the detail on whether it is worth adding to your setup, the full HUANUO review covers installation, cable routing, and how it pairs with a converter.
Third, a sit-stand schedule you actually follow. The hardware is useless if you forget to stand. A browser timer extension that nudges you every 45 minutes is enough. Start conservatively, 25 minutes sitting and 10 minutes standing, for the first two weeks. Your feet and calves need time to adapt. The research on standing desk benefits caps out around 30 percent of the workday standing. Nobody needs to stand for four hours to get the gain. The goal is to interrupt long sitting stretches, not to replace sitting with standing.
Same desk, better posture, no renovation required
The TechOrbits 32-inch desk converter sits on top of whatever desk you already own. No tools, no dedicated standing desk budget, and the keyboard tray is actually sized for a real keyboard plus mouse. Rated 4.6 out of 5 from over 7,100 buyers. Check today's price on Amazon before planning around a specific number.
Amazon Check Today's Price on Amazon →